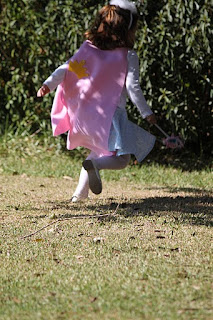
I cringed at Lucy's answer when I asked her what type of party she wanted for her 5th birthday. Princess... I tried to talk her out of it but in the end it was what she truly wanted. I'm not sure why the princess party didn't appeal to me... maybe because it's over used, maybe because I wanted to plan something more unique. In the end though, the one that matters is the birthday girl. So princess it was!
I knew that I wasn't going to go with the Disney Princess theme because she isn't into it all that much. I asked her what colors she wanted her party to be and we went from there.
Our goal in planning this party was to make Lucy and a few of her close little friends feel like a real princess that morning and for all of the mommas to be able to visit and enjoy good conversation over warm cups of coffee. Mission accomplished I believe! The party was from 10 am to noon and at 1 pm some of our guests where just beginning to leave.
So I'll get on with the pictures already!
I made Lucy's skirt after seeing the tutorial on
this awesome website. I brought the scrap fabric to a local friend that monograms and this is the shirt that she came up with.
K made the wand she is holding... plus about 9 more of them! Aren't they adorable?
She also made the ribbon topiary. I'm not sure what site we found those on but I'm sure a quick google search would return many hits. They were simple but time consuming. I'm anxious to make some Christmas ones for my dining room table.
We had place settings for each little princess that included their tea cup, plate, bracelet, a huge diamond ring that doubled as a napkin ring and a cape (more on those later!).
At the beginning of the planning I picked out scrap booking paper in the colors that Lucy had specified. I went with that as a base for all of the decorations. I loved the way her banner came out. In fact, I must really love it because it's still hanging in my dining room right now, ha!
Pom Poms! What is not to love about these? They are so simple and inexpensive to make. They just make the room seem so much more festive!
Moving on now to the dessert table!
I wanted her cake to be spectacular. She sees the other cakes we do and so I didn't want hers to pale in comparison to any of those. We made her a chocolate, strawberry and vanilla cake. We used the cricut to cut the crown and her name. I'm pleased with the simplicity of this cake and loved the daintiness that the edible sugar pearls added.
K made the cookies and they were adorable and delicious! We made the marshmallow pops to add some color to the table but they ended up being a favorite among the children. Easily accessible and everything is more fun if it's a pop!
The garland in the picture above was so simple to make and added more color to the desert table. We used scrap booking paper and punched 1 1/2" circles. Then all you do is set your sewing machine to a basting stitch and slide one circle in after the other! YES! You can sew paper! I think I'll make some for every season!
Next I'd like to show you the capes I referred to earlier. These were the easiest little things to make and I think the girls loved them. My mother-in-law had a pattern for a boy's super hero cape that she modified slightly for our princess capes. We used felt as it would be the easiest route for making ten of them (no hemming or turning under needed to prevent fraying). We used a gold bias tape for the tie and that proved to be the simplest way to go. I hand cut the crowns and K used Heat n' Bond to adhere them to the capes. She came back and appliqued jewels to the points to give them a little added "bling". I loved the way they came out!
I believe that is it! We had such a fun time planning and preparing for this party. Lucy and the girls had a great time and us mommas did too!
Thanks for looking!
KandA


